Korean tacos are pretty much the new banh mi. There's no Kogi BBQ truck in NYC, but there are several places around the boroughs where you can indulge in Korean tacos, and the number is only increasing. Korean tacos, they're so hot right now. This may come as a shocker, but I have yet to try proper Korean tacos. But, thanks to Google, I think I put together an acceptable version.
A coworker of mine recently made this delicious brisket in her slow cooker, and that made me want to dust off my crock pot and put it into use. I was debating between a pulled pork and a green curry pork. AMN recommended that I go with the pulled pork, since it would be more versatile, and I agreed with his suggestion.
At first, I thought I would just make Mexican-style tacos. But as I was writing my grocery shopping list, I received a fateful phone call from my mother. She called to check up on my kimchi supply, and reminded me that I had about 10 cups of overfermented kimchi. "Better make some kimchi stew," she said. But, I wasn't in the mood for kimchi stew, as delicious as it can be. Why not throw the kimchi into some tacos instead! I'd never had Korean tacos before, but I imagined that they would taste similar to ssam, with a tortilla instead of a piece of leafy green.
For the pork, I needed a very simple recipe that would not overpower the flavors of the spicy sauce I wanted to make. So, I turned to Momofuku for a very simple salt and sugar rub, which they use for the pork shoulder in their ramen and their bo ssam. The smallest pork shoulder at my local store was a 9-lber, so I had to break it down to fit it into my 4-quart slow cooker. Other than that, the pork required very little active time, and the garnishes also came together very quickly.
I assembled each corn tortilla with pulled pork, Kogi BBQ sauce, sriracha sauce, thin slices of green onion, kimchi, and a Korean lettuce salad. Nom nom.
Slow Cooker Pulled Pork Shoulder
Adapted from the Momofuku cookbook
For 24+ tacos
1 whole 8- to 10-pound bone-in pork shoulder or Boston pork butt
1/4 cup granulated sugar
1/4 cup coarse salt
1. Mix together the sugar and salt in a bowl, and rub the mixture into the meat; discard any excess salt and sugar mixture. Place in a bowl, cover with plastic wrap, and put it into the fridge for at least 6 hours, or overnight.
2. Remove the pork from the fridge and discard any juices that have accumulated. Put the pork in a slow cooker and cook on low for 8 hours, or until the pork shreds easily. Remove the pork onto a baking sheet to cool and shred.
Kogi BBQ Sauce
Adapted from Steamy Kitchen
For 12 tacos
2 tablespoons Korean fermented hot pepper paste (gochujang)
1 tablespoon sugar
2 tablespoons soy sauce
1 teaspoon rice wine vinegar
2 teaspoons sesame oil
1. Mix all the ingredients together until smooth and sugar has dissolved.
Korean Lettuce Salad
Adapted from Asian Enticement
For 10 tacos
3 cups romaine lettuce, shredded into quarter inch strips
1 tablespoon soy sauce
1 tablespoon sesame oil
1 teaspoon sugar
1 teaspoon sesame seeds
1 teaspoon Korean red pepper flakes
1. Mix the soy sause, sesame oil, sugar, sesame seeds, and red pepper flakes. Pour over lettuce and mix gently.
February 20, 2011
Korean Pulled Pork Tacos
September 6, 2010
Olive Oil Bundt Cake

Ever since i had a bite of Maialino's revelatory olive oil muffin, olive oil baked goods have been on my mind. Baking is not my forté and my last olive oil cake was painfully dry, but my new, unopened bottle of extra virgin olive oil was calling to me.
Frantoia EVOO is quite a splurge (even at a 50% discount), but it is a staple in my pantry. If it's good enough for Eric Ripert, then it's certainly worth trying. It is great for dressings and drizzling on top of anything, including your finger. The olive oil cake recipe that I decided to use calls for a Sicilian olive oil, so Frantoia seemed like a suitable alternative to Frankies EVOO, which seems to be available at the Food Coop. I may have to pick up a bottle sometime, after I finally visit Frankies 457.
This recipe yields a light, fluffy cake that would complement a cup of tea or coffee. Basically, it's a cake that I'm going to eat for breakfast. The tablespoon of orange zest gives the cake a hint of citrus flavor without overpowering the olive oil, which is truly the hero in this dessert. Although the original recipe says that the bake time is about an hour, I found that my cake was completely done at 45 minutes. It was a little overbaked, and i would have preferred to have taken it out at 40 minutes. Fortunately, the cake flour helped to keep it soft.
Olive Oil Bundt Cake
Adapted from Food & Wine
Serves 12 (Or 4... I definitely ate 1/4 of this cake by myself)
5 large eggs at room temperature
1 1/4 cups sugar
1 tablespoon finely grated orange zest
1 cup extra virgin olive oil
2 cups cake flour
1 1/4 teaspoons baking powder
1 teaspoon fine sea salt
1. Preheat the oven to 325°. Butter and flour a 10-cup bundt pan.
2. With an electric mixer, beat the eggs with the sugar and orange zest at medium-high speed until smooth. Gradually beat in the olive oil until creamy, about 2 minutes.
3. In a separate bowl, whisk the cake flour with the baking powder and salt. Add the dry ingredients to the egg mixture in 3 batches, beating on medium speed between additions.
4. Scrape the batter into the bundt pan and bake in the center of the oven for 35-40 minutes or until done. Let cool in the pan for 15 minutes, then invert onto a rack. Let the cake cool completely before cutting into slices and serving.
September 2, 2010
The War on Drugs - The Rock Shop 08.31.10

It's funny how an album can slip through the cracks, only to be picked up over a year later and heard in a completely different light. One nice plus of having a blog is that it can serve as a personal repository of memories, impressions, and regrets. The best part? I can Google search my brain. Over a year ago, I was obsessing over "Taking the Farm," a song by The War on Drugs, a Philly-based band that formerly had Kurt Vile as an active member (Sounds like he's on indefinite hiatus). Although I loved that track to death, I don't think I'd ever made it through Wagonwheel Blues in its entirety.
Things have changed since then, and now I almost exclusively listen to albums, rather than a bunch of singles or one-off tracks from several artists. With Monday's announcement of The War on Drugs' forthcoming EP and the stunning "Comin' Through," I decided to give Wagonwheel Blues a much-needed revisit. To my surprise, I took to the album immediately. During this revelatory moment, I realized that the band was probably performing onstage at the Knitting Factory. Fortunately, I saw that they were playing another Brooklyn show the following day, right around my neighborhood. Some things are just meant to be.
For a mainly Kurt Vile fan, seeing The War on Drugs for the first time feels like entering a strange, alternate universe. Frontman Adam Granduciel and drummer Mike Zanghi are members of the Violators, the backing band for Kurt Vile, but the guys seemed much more in their element as The War on Drugs. With a style that's reminiscent of Bob Dylan, Granduciel has a love-it-or-hate-it voice that fits in perfectly with my understanding of the band: a modern, experimental take on Americana. As a live band, The War on Drugs delivered a near-perfect balance of precision and new interpretations, something that I've always felt that KV struggled with in his shows. During their set, The War on Drugs unveiled some new tunes, including the organ-driven "Baby Missiles," my current favorite off the Future Weather EP. But, they were sure to bring out old favorites like a less hazy rendition of "Taking the Farm" and an extended, jammy version of "A Needle In Your Eye #16."
Ultimately, I am amazed by the band's ability to create a complex sound from rather simple parts. I could spend hours trying to break down the devastatingly beautiful melodies into their layers, and I discover something new every time I listen. I have to admit that the lack of harmonica for this show was a bummer for me, especially for a song like "Arms Like Boulders," which opens with a great solo line. I can only imagine what The War on Drugs could sound like if they added a third guitarist, but I'm pretty sure that they would melt faces.
For those of you who haven't been to The Rock Shop yet, the "venue" part is pretty small, kind of like the Pianos showroom. Like Pianos, the sound at The Rock Shop is pretty incredible and can get surprisingly loud. I am a fan.
Future Weather will be released on October 28. It looks like The War on Drugs is hitting Virginia and North Carolina in the next couple of weeks, so definitely check them out if they roll through your town.
Comin' Through - The War on Drugs
Show Me The Coast - The War on Drugs
August 5, 2010
Sweet Corn Ice Cream

Out of my ice cream experiments thus far, this sweet corn ice cream is one of my favorites. It's like a sweet, frozen creamed corn. This recipe is very rich, so feel free to add more milk. I didn't do a great job of removing the solid corn puree, but the ice cream tasted fine with a little bit of corn texture. The tricky part of this custard mix was determining when it was finished cooking. The corn puree makes the base very thick to begin with, so it was hard for me to use the spoon trick. I would recommend using a thermometer.
Sweet Corn Ice Cream
Adapted from Epicurious/Gramercy Tavern
Yield: Makes a scant quart
4 ears fresh corn, shucked
2 cups milk
2 cups heavy cream
3/4 cup sugar
9 large egg yolks
1. Using a large knife, slice the kernels off the corn cobs and place in a large saucepan. Break the cobs into thirds and add them to the pot along with the milk, cream, and 1/2 cup of the sugar. Bring the mixture to a boil, stirring, then turn off the heat. Using an immersion mixer or a blender, puree the corn kernels (not the cobs). Infuse for 1 hour.
2. Bring the mixture back to a simmer, then turn off the heat. In a small bowl, whisk the egg yolks and remaining 1/4 cup of sugar. Temper the eggs and return the mixture to the pan. Cook over medium-low heat, stirring constantly, until the custard thickens enough to coat the spoon, about 10 minutes.
3. Pass the custard through a fine sieve, pressing down hard on the solids, discard solids. Let the custard cool, then cover and chill for at least 4 hours. Freeze in an ice cream maker according to the manufacturer's directions.
August 4, 2010
Corn Chowder with Bacon and Basil

My wonderful new office space organizes a weekly CSA delivery, and I am reaping the benefits. Although I haven't signed up for a share since we're moving to a new office in a couple of weeks, I have been helping myself to the free leftovers. For the past two weeks, the leftovers have been corn, a Midwesterner's best friend. Growing up in Illinois, I went to a corn festival every year, not by choice. The forced attendance pretty much ruined corn for me, but my love for corn has been recently reignited. In fact, I'm eating a corn salad while I'm typing up this post.
While looking around on Tastespotting, I came across a delicious-looking picture for a summer corn chowder. For a chowder with bacon, this soup is surprisingly light. A vegetarian version would have been tasty, but the smokiness from the bacon really sold me.
Corn Chowder with Bacon and Basil
Adapted from Bitchin' Camero
Serves 4
5 slices pepper bacon, cut into strips (regular is fine too)
1 small yellow onion, diced
2 medium red potatoes, diced
4 ears of corn, shucked
1 1/2 cups chicken stock
1 cup slim milk
1 tablespoon. salt (or to taste)
1/2 teaspoon freshly ground black pepper
1 bunch basil leaves, thinly sliced (chiffonade)
1. Set a large pot over medium heat and add the bacon. Cook until all of the fat is rendered and the bacon turns golden and crisp, about 8 minutes. Remove the bacon to a paper towel with a slotted spatula or spoon. Leave the bacon fat in the pot.
2. Add the onions and potatoes to the pot and cook, stirring occasionally to prevent sticking, until the onions turn translucent, about 10 – 15 minutes. Add the corn and stock and use a wooden spoon to deglaze the bottom of the pot. Let simmer for an additional 5 – 10 minutes.
3. Remove from heat and stir in the milk. Using an immersion blender or food processor, pulse the soup a few times to thicken, but avoid making it too smooth.
4. Return to low heat and add the salt and pepper. Taste and adjust the seasoning as needed.
5. Ladle into bowls and top with the bacon and basil ribbons.
August 2, 2010
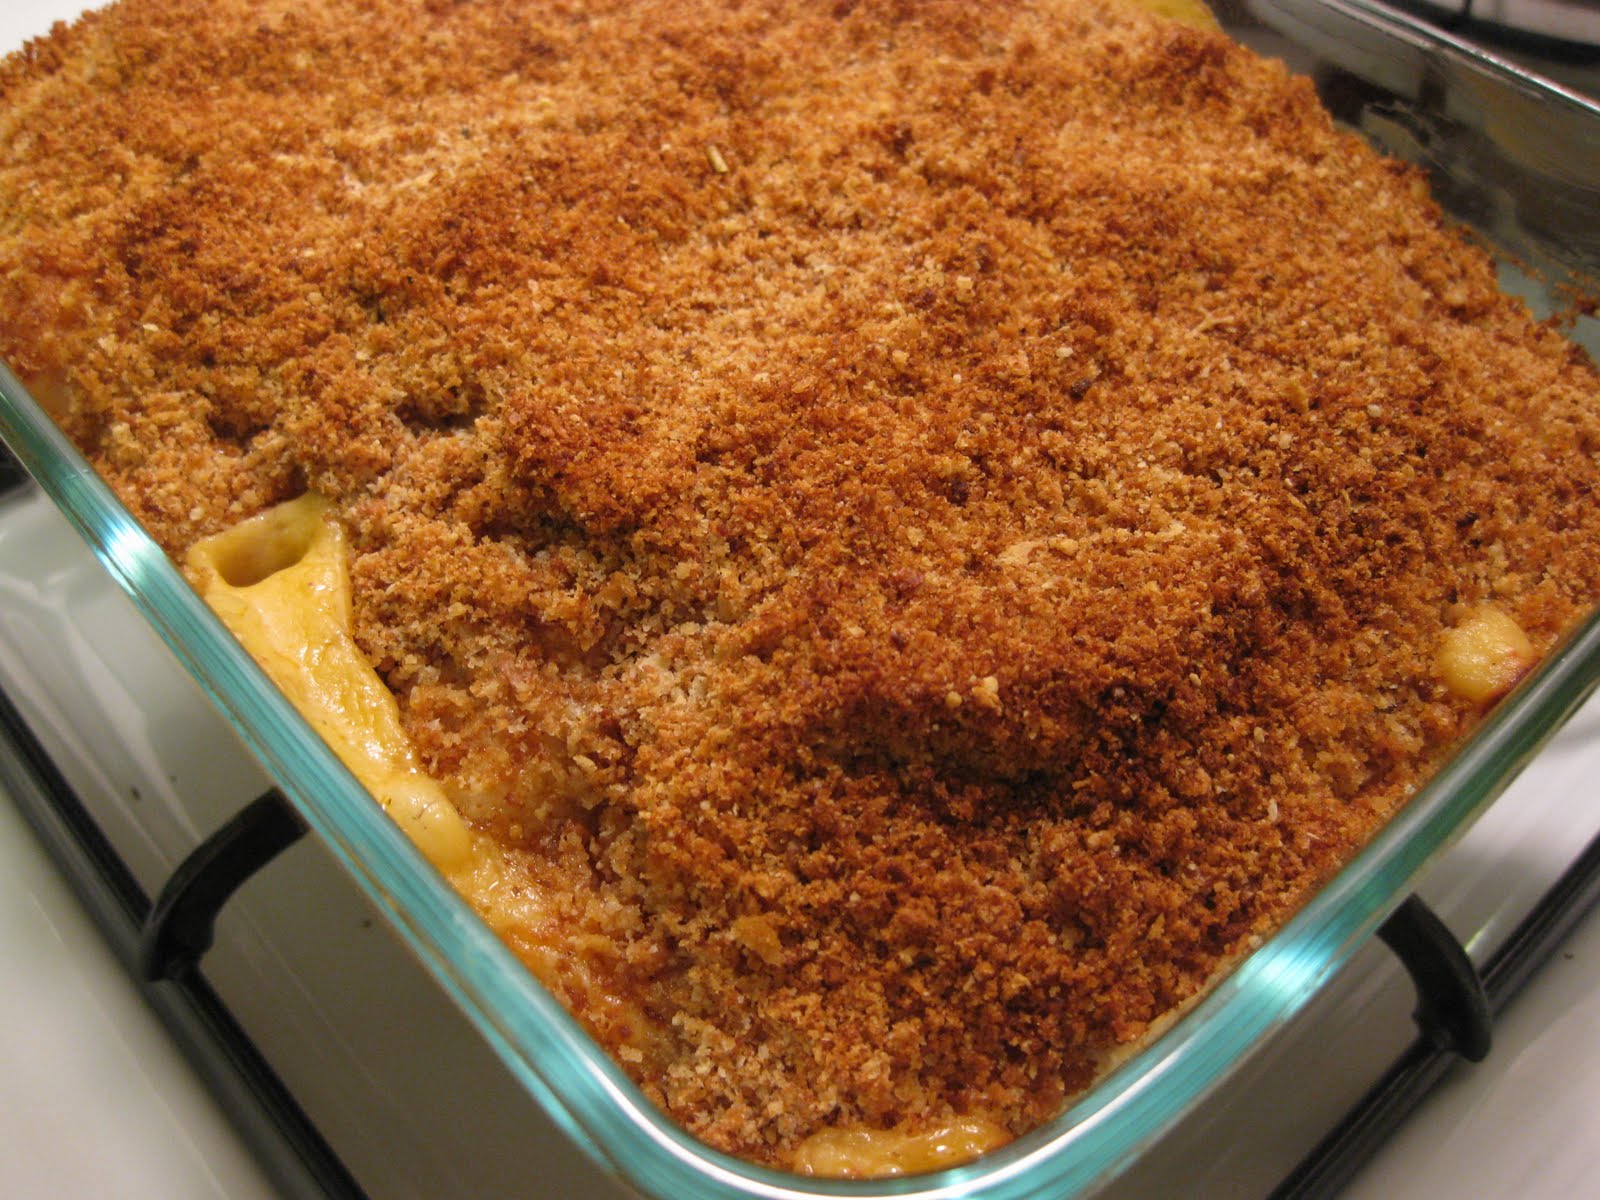
Kimchi Bacon Mac and Cheese

Whenever Mama Kim rolls into town, I can guarantee that there will be at least one large Ziploc bag of kimchi with her luggage. So, what do I do with all the kimchi? Kimchi stew, spicy tofu, cold noodles, and pancakes are usually what I turn to when I need to use my super fermented kimchi. Recently, I had a glorious idea for a dish that calls for kimchi. Take a basic mac and cheese, add kimchi and bacon, and you've got yourself a new Korean-American classic. Seriously, how is this not already a trend? Although it sounds strange, cheese complements Korean flavors really well. I've seen it in ramen and kimbap, so a kimchi mac and cheese seemed like a natural combination.
This kimchi bacon mac and cheese is dangerously delicious. The combination of rich cheese, salty bacon, and sour kimchi is unlike anything that I've ever tasted, and I'm finding it hard to exercise portion control. You have been warned.
Kimchi Bacon Mac and Cheese
Mac and Cheese Base Adapted from Martha Stewart (via Smitten Kitchen)
Serves 6
1 1/2 cups kimchi
6 slices bacon
3 1/2 tablespoons butter
1 cup breadcrumbs
2 3/4 cups milk
1/4 cup all-purpose flour
1/8 teaspoon ground nutmeg
1/8 teaspoon freshly ground black pepper
1/8 teaspoon cayenne pepper
2 1/4 cups grated sharp white cheddar cheese
1 cup (about 8 ounces) grated Gruyère
1/2 pound elbow macaroni (I used whole wheat)
1. Preheat oven to 375°F. Squeeze kimchi to remove excess juice. Dice into small, 1/2 inch pieces.
2. Cook bacon in a skillet until crispy. Remove bacon with a slotted spoon and pat with paper towels. Cook kimchi in remaining bacon fat over medium heat until slightly tender, about 4-5 minutes.
3. Warm the milk in a medium saucepan over medium heat. Melt 3 tablespoons butter in a high-sided skillet over medium heat. When the butter bubbles, add the flour. Cook, stirring, 1 minute.
4. While whisking, slowly pour in the hot milk a little at a time to keep mixture smooth. Continue cooking, whisking constantly, until the mixture bubbles and becomes thick.
5. Remove the pan from the heat. Stir in nutmeg, black pepper, cayenne pepper, 1 1/2 cups cheddar cheese, and 3/4 cup Gruyère. Add the bacon and set the cheese sauce aside.
6. Cover a large pot of water, and bring to a boil. Cook the macaroni until the outside of pasta is cooked and the inside is underdone. Transfer the macaroni to a colander, rinse under cold running water, and drain well. Stir the macaroni and kimchi into the reserved cheese sauce. If desired, salt to taste.
7. Melt 1/2 tablespoon butter in a skillet and toast breadcrumbs until golden.
8. Pour the mixture into the prepared dish. Sprinkle the remaining 3/4 cups cheddar cheese, 1/4 cup Gruyère, and the breadcrumbs over the top. Bake until golden brown, about 20-30 minutes. Transfer the dish to a wire rack for 5 minutes; serve.